Introduction
During the winter brake, I got back into American Truck Simulator. I can't describe it, but there is something about listening to music while driving a huge truck through America. It's not something I would necessarily expect to enjoy but I really get into it.
One of my favourite aspects of driving a truck is shifting gears. Carefully selecting the right gear out of the 13 or even 18 gears for the right situation is as tricky as it is rewarding. But how do you select gears in a truck with 13 or 18 gears you might ask. Trucks with manual transmissions use what are called range selectors to change between sets of gears. The video below demonstrates how this works.
Up until now, I had been using two buttons on my steering wheel to toggle between the ranges. This is unpractical especially when switching gears while the wheel is turned. So one day I decided I had enough and started thinking of a solution. My first ideas involved creating a shifter knob with integrated switches, similar to what the real trucks use. I quickly realised, that this had several drawbacks. Modeling the knob would not be easy and fitting two switches in such a small space would be a challenge as well. I finally decided to keep the shifter knob from my shifter and create an enclosure for the switches that would clamp on the rod below the knob.
The First Prototype
I found two switches that were laying around and started CADing the enclosure in FreeCAD. I came up with a first version in less than 30min and sent it to the printer. The print came out nice but I quickly realised that even though there was enough room in the enclosure for the switches, there was not enough to get them into place. But hey, nothing a pair of pliers couldn't fix.
After brutally mutilating my beautify print, I could fit the switches in the enclosure and I went on to soldering. I soldered long wires directly to the terminals that were connected to an Arduino that I intended to mount somewhere on the sim rig.
I then quickly wrote some code for the Arduino that would make it emulate a game controller and tested it in game. ATS immediately recognized the new controller and I managed to map the switches to the range selectors. But something wasn't right. Flipping either of the switches was not always registered by the game. In the end, I had to modify the code on the Arduino. I had implemented it in such a way that it would only send its current state whenever the state of one of the switches had changed. By changing it so that it continuously sends the current state, the aforementioned issue was resolved.
Final version
After playing for a number of hours with the first prototype, it was clear that I would never be able to play without it again. Being able to tell what position the range selectors are in makes it a lot less frustrating.
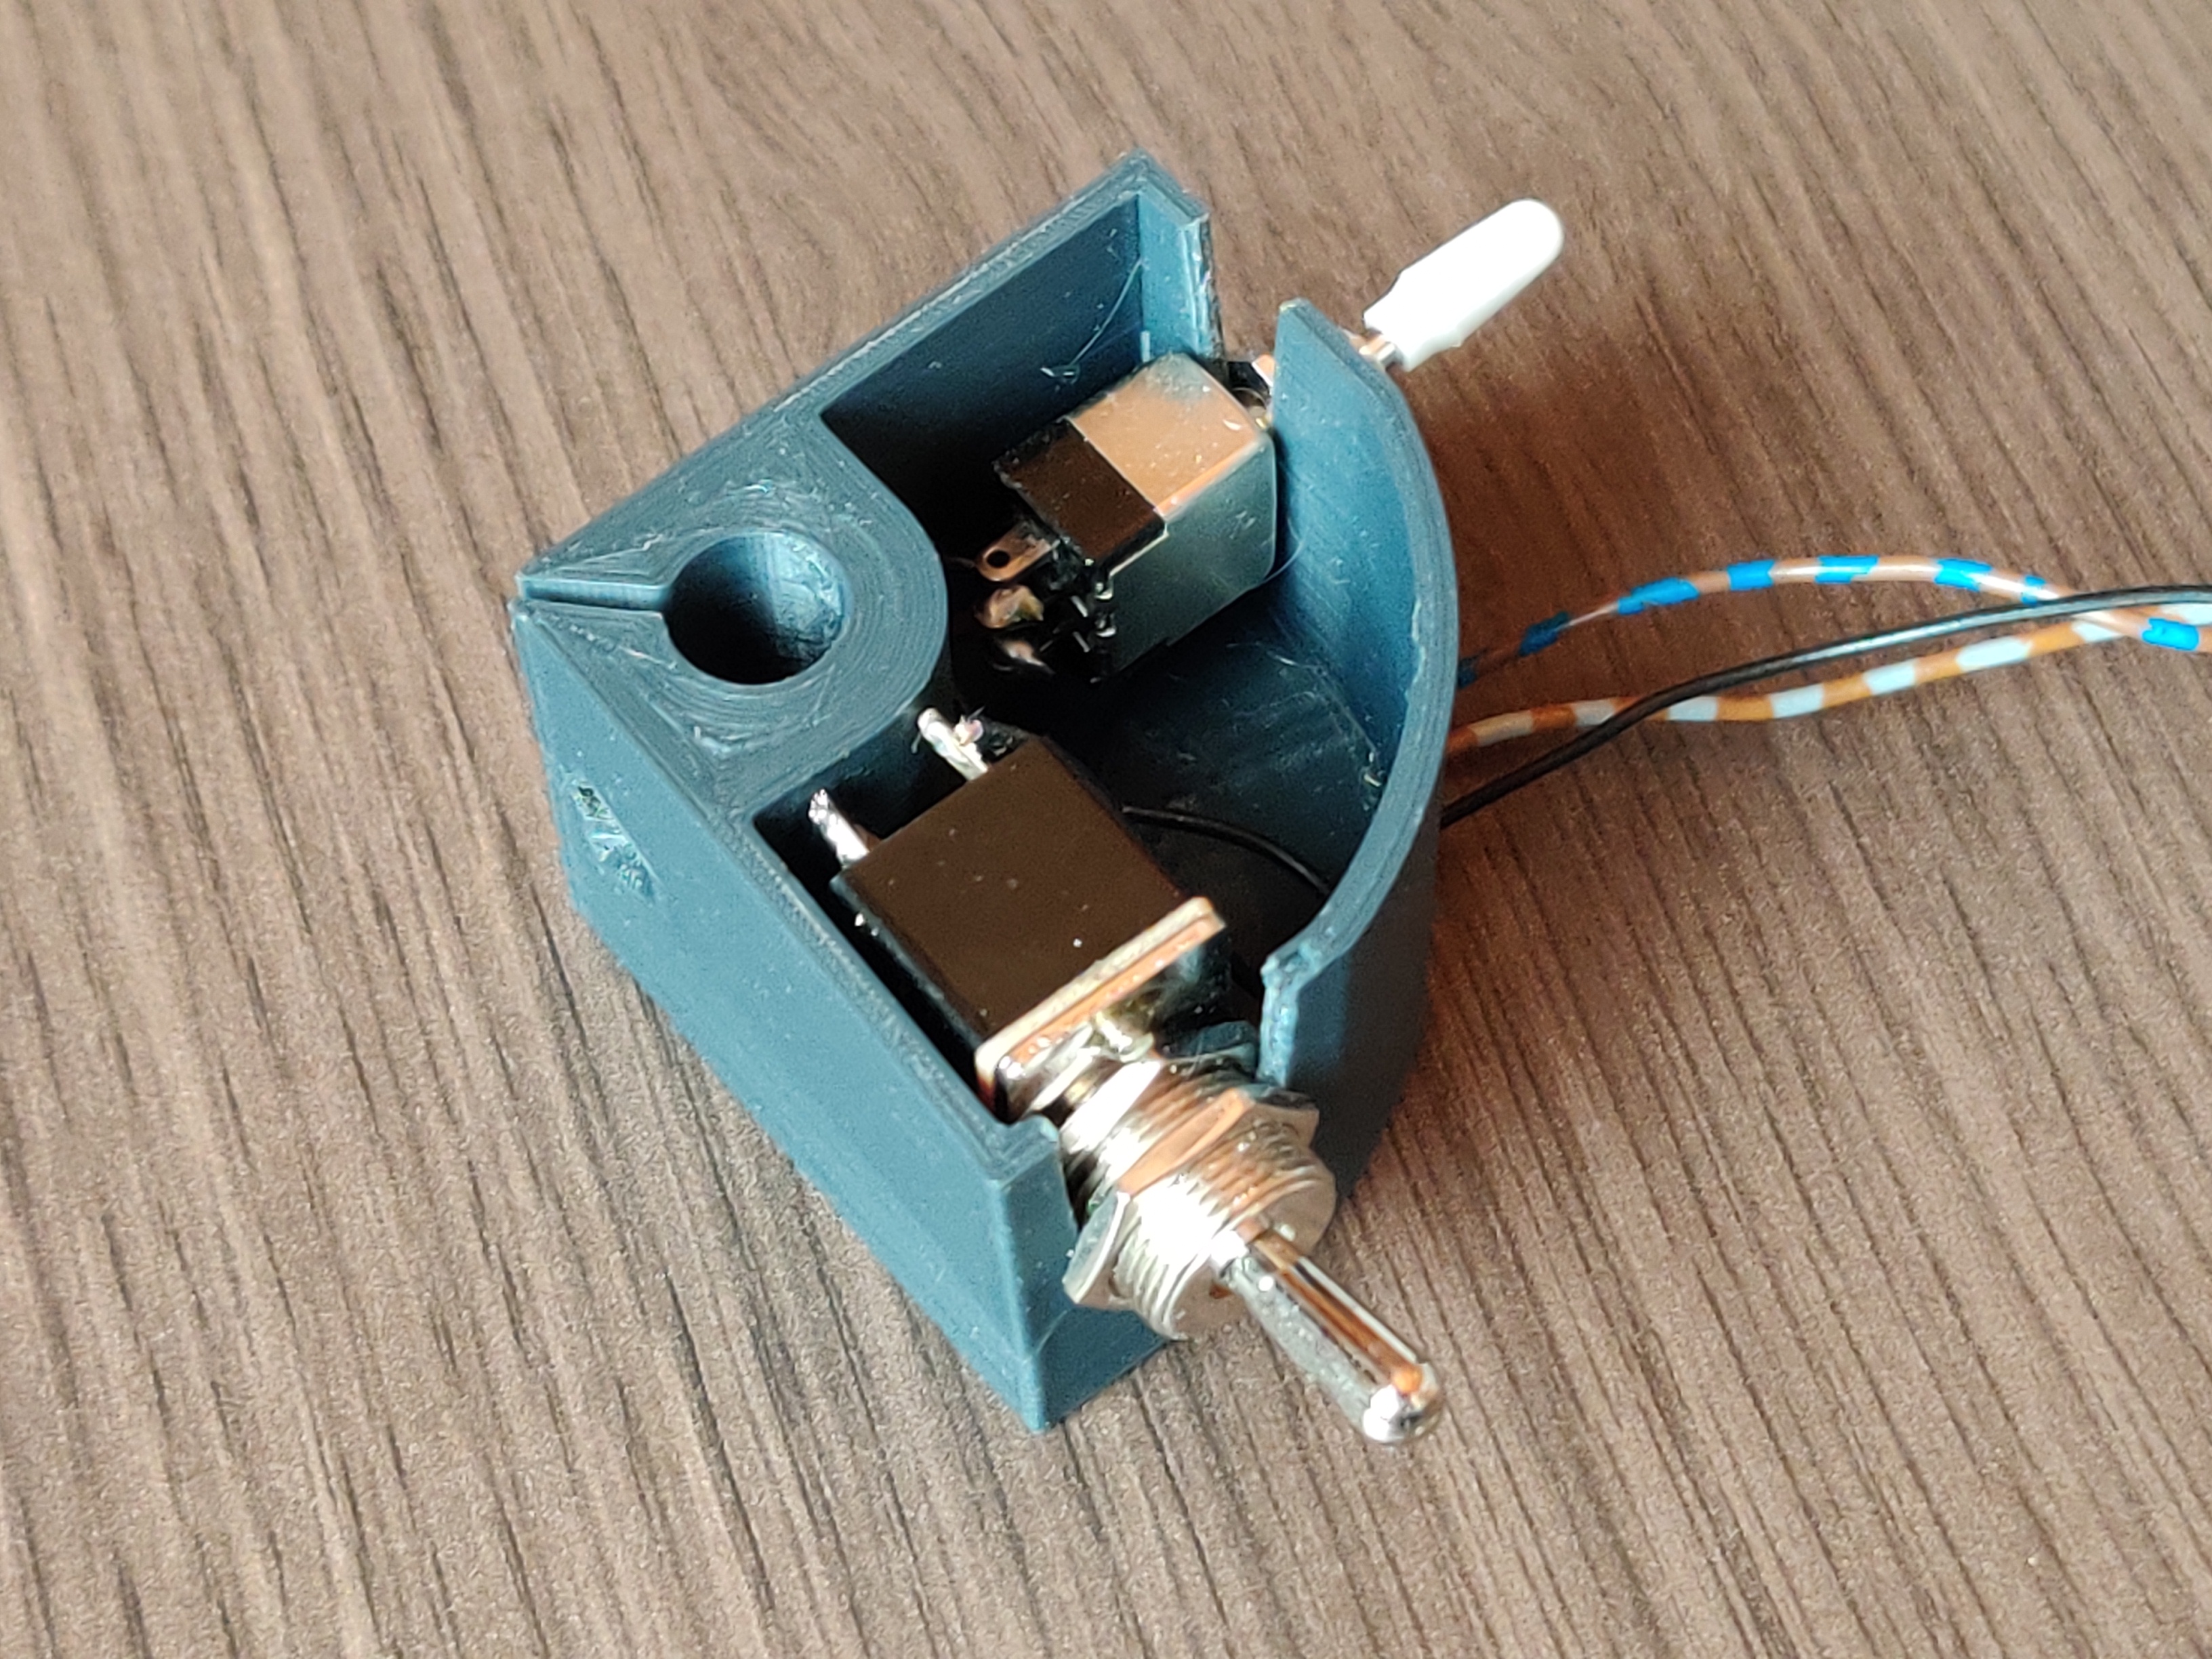
But I wasn't entirely happy with the product and there were a couple of things that needed to be improved. First, the switches I used where quite heavy to actuate and also loud. Then because of the mutilated enclosure, the switches could not be tightened properly and got loose while playing.
So I ordered a Toggle switch for the back and a rocker switch for the side and I reworked the CAD to end up with this.

And this time, installing the switches wasn't an issue because they are inserted from the front.
And there you have it. The final version mounted to my shifter.
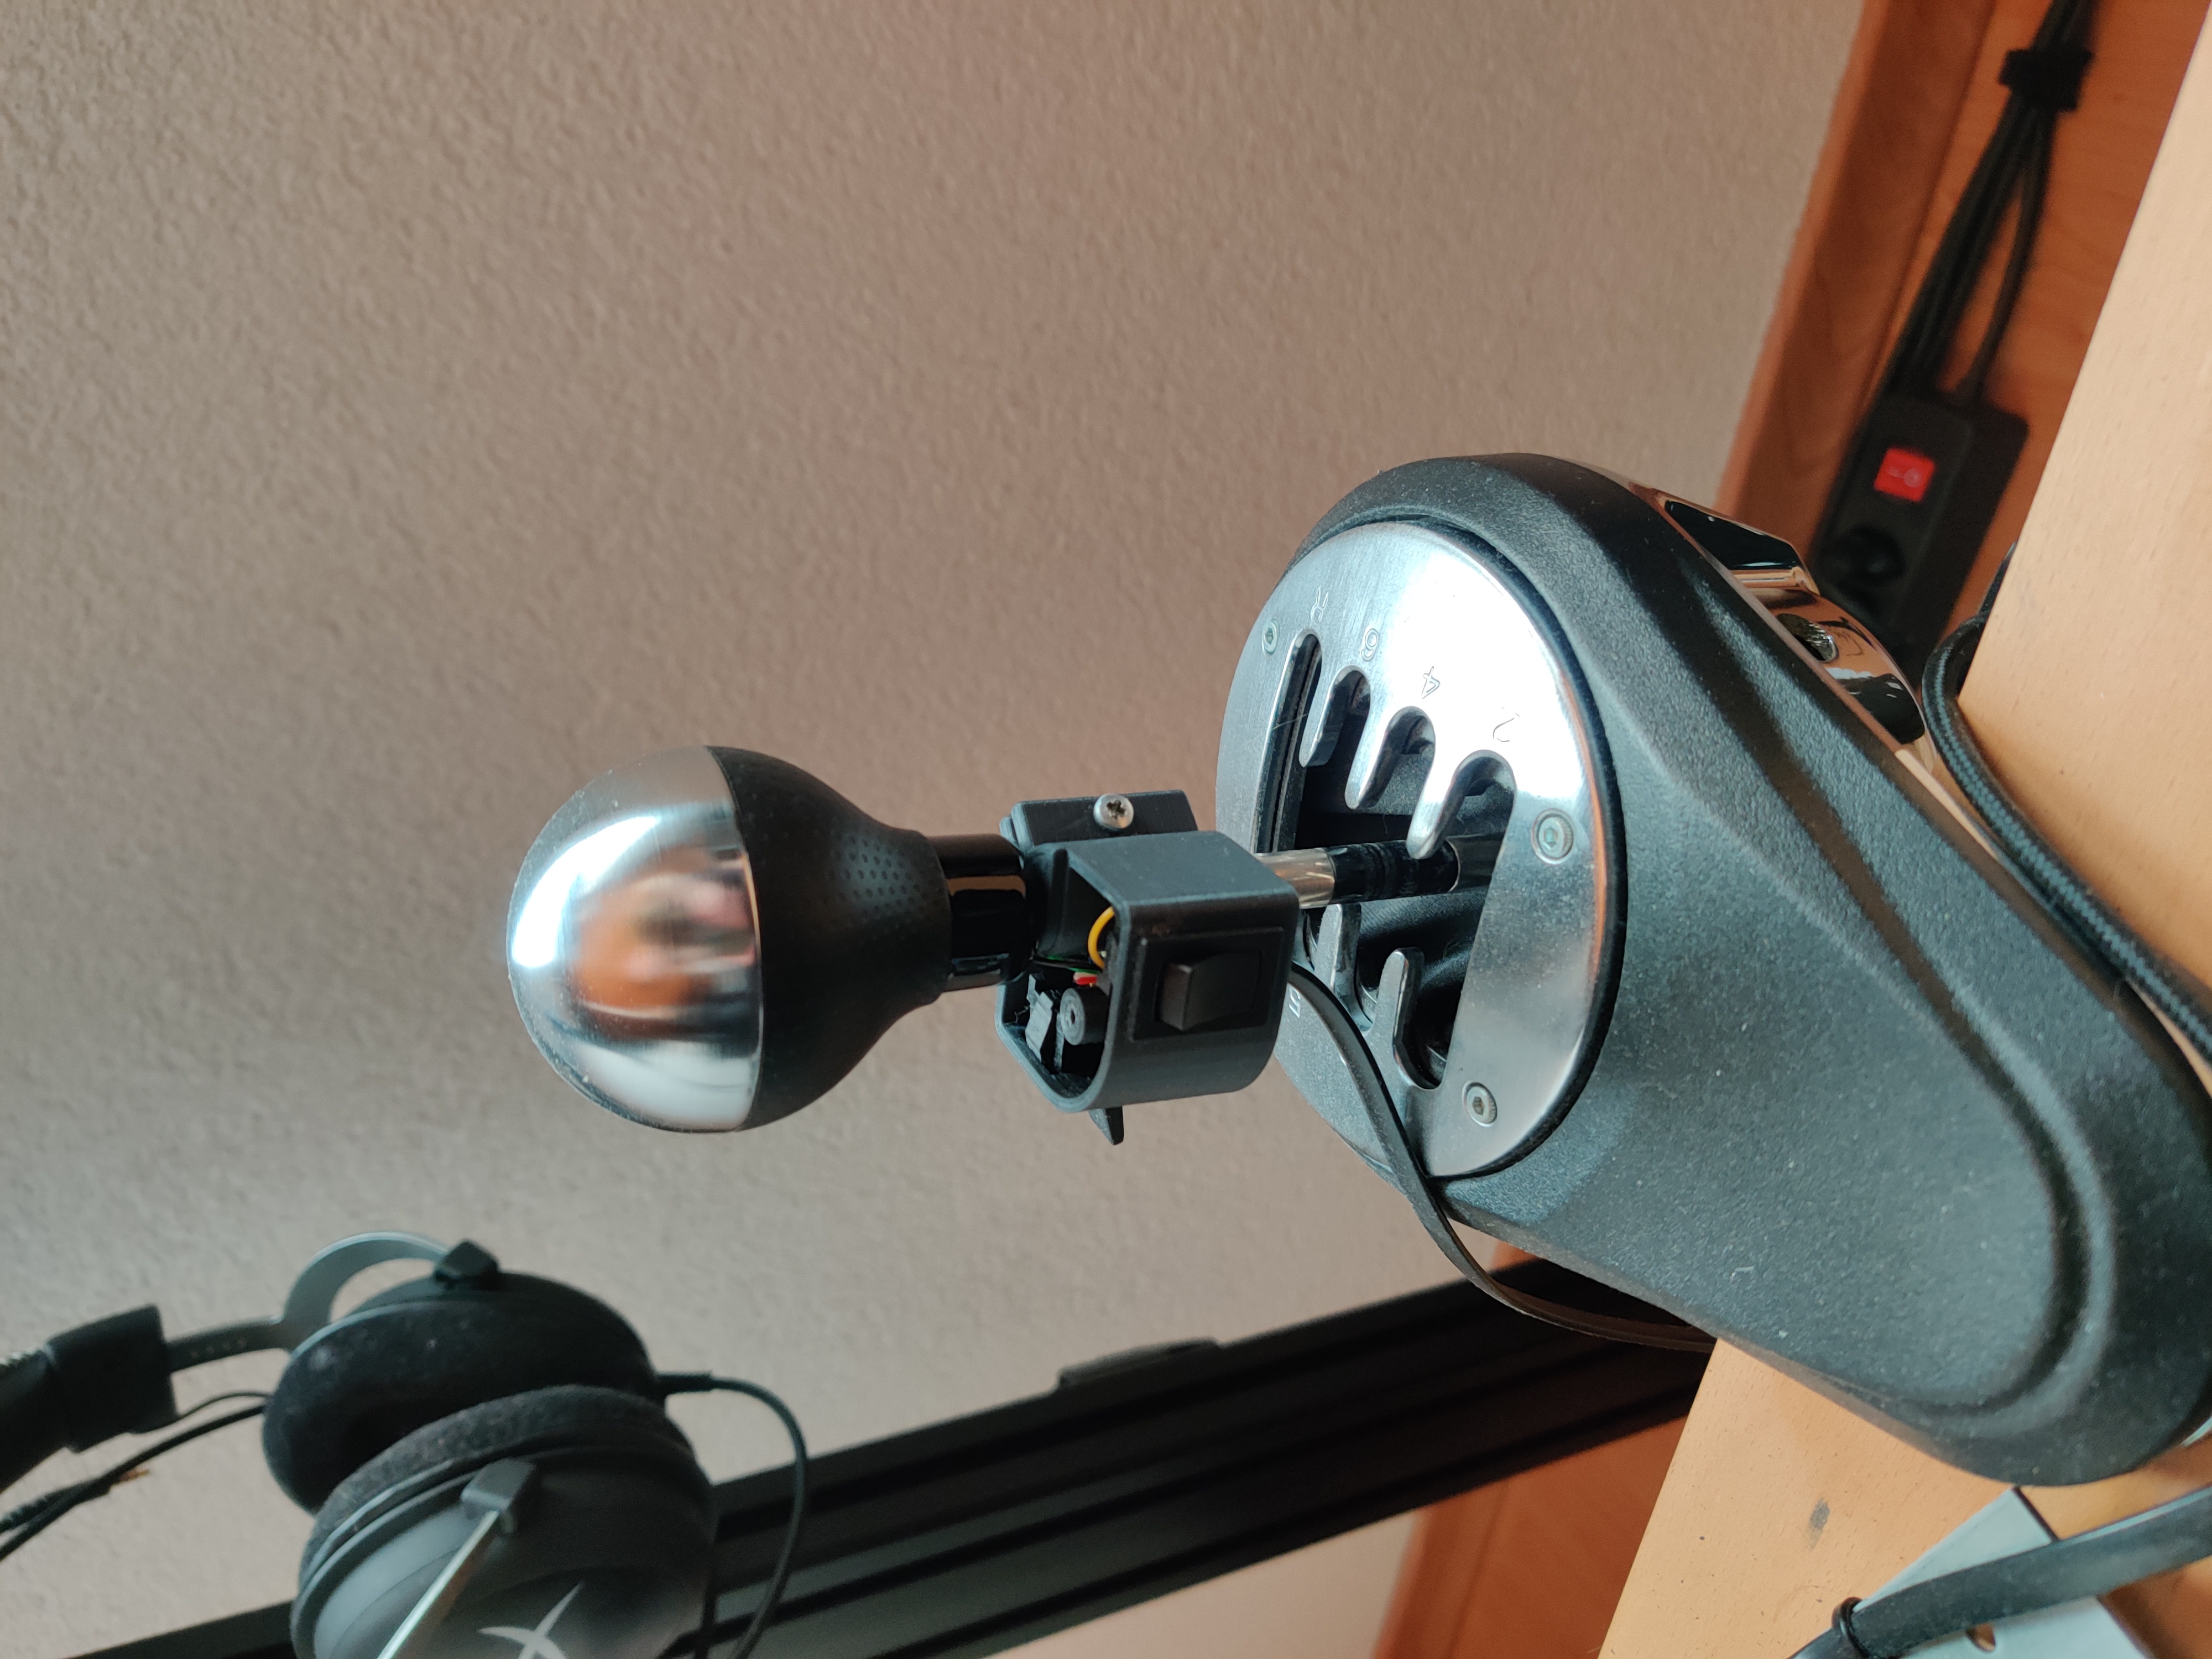
Psst, it's me, 2023 Tibo here to tell you that no, I still have not printed the lid xD.